2D Platform Games Part 9: Storing Levels in Files / Level Editors
IMPORTANT! From Part 8 onwards, you no longer require the Visual C++ 2010 Redistributable Package installed in order to be able to try the pre-compiled EXEs provided with the examples.
IMPORTANT! From Part 6 onwards, compatibility with Windows Vista in the pre-compiled EXEs has been dropped. To run the pre-compiled EXEs, you must have Windows 7 Service Pack 1 with Platform Update for Windows 7 installed, or Windows 8.
This article builds upon the demo project created in 2D Platform Games Part 8: Pass-through Platforms. Start with 2D Platform Games Part 1: Collision Detection for Dummies if you just stumbled upon this page at random!
Download source code and compiled EXE for the code in this article as well as the complete source code and compiled EXE for the level editor.
Until now we have just used a fairly arbitrary demo level that was hard-wired into our game code. This is neither very flexible nor very fast. It’s hard to create levels, and we also can’t offload that task to other members of our team. The solution, of course, is to make a level editor application which can save levels into files that the game can load.

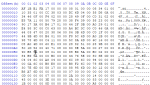
Figure 1. Basic level editor for our platform game
Now, I can’t show you in one article how to learn Windows or other GUI programming and write a level editor, however we will look at several important topics around this:
- how to re-factor the way levels are stored in memory so they can be exported to a file
- how to export a level to a file
- how to import a level from a file
- how to add versioning to your level files
- the basics of what a feature-complete level editor should do
- sharing common code between the game and level editor applications
- some tips and code snippets on how to create useful level editing tools and how to make your Windows-based level editor work with Direct2D
I have created a basic level editor which allows the user to create all of the things we have talked about so far in this series (normal, frictionless and sticky platforms, ladders, pass-through platforms, moving platforms and adjusting the player position) along with a small set of basic tools like snap-to-grid and snap-rotate to get the ball rolling. The full source code is included in the link above and it is fully commented, so feel free to check it out and steal any relevant parts for your own applications!
I will update the level editor as new features are added to the game project, but won’t be blogging all the details on how it was coded or how it works as it is mostly a case of pretty bog-standard Windows GUI programming. Full source code will be provided for all new versions, however.
Initial re-evaluation of the game design
Before we do anything else, we check the design of our game to see if anything needs to be changed before we start saving things to external files. Currently we are storing the behaviour-modifier flags allowInside, allowFallThrough, allowFromAbove, allowFromBelow, allowFromLeft and allowFromRight on a per-platform basis. That is, each of these flags can be set individual for each platform in the level. In reality, we really only use specific combinations of these flags, and they are tightly associated with the type of platform being used. For example, only ladders use the allowInside modifier, and only pass-through platforms use the allowFrom* modifiers. So we re-factor the code to move these flags from the Platform struct (which describes individual platforms) to the Surface struct (which describes the properties of each type of platform).
- Move the declarations of the six flags above from
PlatformtoSurface - Add default settings for the flags to each platform type in the main game class constructor:
surfaces[Normal].allowInside = false;
surfaces[Normal].allowFallThrough = false;
surfaces[Normal].allowFromLeft = false;
surfaces[Normal].allowFromRight = false;
surfaces[Normal].allowFromAbove = false;
surfaces[Normal].allowFromBelow = false;

surfaces[Frictionless].allowInside = false;
surfaces[Frictionless].allowFallThrough = false;
surfaces[Frictionless].allowFromLeft = false;
surfaces[Frictionless].allowFromRight = false;
surfaces[Frictionless].allowFromAbove = false;
surfaces[Frictionless].allowFromBelow = false;

surfaces[Sticky].allowInside = false;
surfaces[Sticky].allowFallThrough = false;
surfaces[Sticky].allowFromLeft = false;
surfaces[Sticky].allowFromRight = false;
surfaces[Sticky].allowFromAbove = false;
surfaces[Sticky].allowFromBelow = false;

surfaces[Ladder].allowInside = true; // NOTE: Set to true
surfaces[Ladder].allowFallThrough = false;
surfaces[Ladder].allowFromLeft = false;
surfaces[Ladder].allowFromRight = false;
surfaces[Ladder].allowFromAbove = false;
surfaces[Ladder].allowFromBelow = false;

surfaces[JumpThrough].allowInside = false;
surfaces[JumpThrough].allowFallThrough = false;
surfaces[JumpThrough].allowFromLeft = true; // NOTE: Set to true
surfaces[JumpThrough].allowFromRight = true; // NOTE: Set to true
surfaces[JumpThrough].allowFromAbove = false;
surfaces[JumpThrough].allowFromBelow = true; // NOTE: Set to true
- Remove all references to the individual per-platform settings for these flags in the world creation code in
SetupResources() - Find & Replace:
(*it)->allowInsidewithsurfaces[(*it)->surface].allowInside - Find & Replace:
(*it)->allowFallThroughwithsurfaces[(*it)->surface].allowFallThrough - Find & Replace:
(*it)->allowFromAbovewithsurfaces[(*it)->surface].allowFromAbove - Find & Replace:
(*it)->allowFromBelowwithsurfaces[(*it)->surface].allowFromBelow - Find & Replace:
(*it)->allowFromLeftwithsurfaces[(*it)->surface].allowFromLeft - Find & Replace:
(*it)->allowFromRightwithsurfaces[(*it)->surface].allowFromRight - Find & Replace:
jumpPlatform->allowInsidewithsurfaces[jumpPlatform->surface].allowInside
Re-factoring complete.
Re-factoring the way levels are stored
Data from an application to be stored in a file goes through a process called serialization. Serializing a variable or object essentially turns it into a set of values (numbers, bytes, text or whatever format the serialization code uses) which represent the variable or object in such a way that when the serialized version is read back in – ie. de-serialized – an exact copy of the original variable or object can be re-created.
Naturally there are limitations on what can and can’t be serialized. A number like ‘6’ or a string like ‘hello’ is easily serialized by simply writing its value to a file. But there are some types which it doesn’t make sense to serialize, for example pointers or resource handles. If you serialize a pointer into a file, close your application, re-open it, re-open the file and deserialize the pointer, sure, you will get the pointer to the same memory address as before, but the data being pointed to will have changed, so it is non-sensical to store it in a file in the first place. Resource handles (eg. file handles to images, music, window handles, network or database connections etc.) should not be serialized for the same reason: they will be invalid (out of date) when they are deserialized. And herein lies the problem: most game world objects contain member objects and resources which can’t be easily serialized, including ours. Instead, we have to store the information needed to allow these objects and resources to be re-created in exact replica, and provide code in the level loader to do the object and resource re-creation.
At the moment, we create the game world in SetupResources() by taking a bunch of values (creation parameters like width, height, rotation etc.), creating Direct2D geometry objects from them and then discarding the creation parameters since they are no longer needed. Similarly, we create Animations for moving platforms by specifying the time period, amount of movement etc. then throwing that information away once we have the Animation objects themselves. Direct2D geometry objects can’t be serialized and neither can Animation objects, so we have to change our plan and store the creation parameters in the file instead. Of course, we can still create and use these non-serializable objects – we have to, our game won’t work without them – it’s just that if we want to be able to load from and save to file, we need to provide a separate data structure containing all the information needed to let the game create these objects from scratch.
We are actually kind of half-way there already with our demo level creation code, as we used a temporary struct to save a lot of typing. Let’s review how we make geometry and moving platforms at the moment:
typedef enum { Rectangle, Ellipse } ShapeType;

// This structure allows us to quickly define the layout of each landscape object
typedef struct {
	int width;
	int height;
	ShapeType shape;
	float scaleX;
	float scaleY;
	GeometryTransformPoint scalePoint;
	float skewAngleX;
	float skewAngleY;
	GeometryTransformPoint skewPoint;
	float rotAngle;
	GeometryTransformPoint rotPoint;
	int topLeftX;
	int topLeftY;
} ObjectDefinition;

int worldObjectCount = 22;

worldObjects.clear();

// Create the landscape definition
ObjectDefinition objdef[] =
{
	// Gently sloping straight surface
	{ 80*6,  80*1, Rectangle, .5f,  .5f,  PointBottomLeft, 0.f, -10.f, PointBottomLeft, 0.f,  PointBottomLeft, 80,  ResolutionY - 200 },

	// Block to help climb up steep sloping wall
	{ 80*1,  80*1, Rectangle, .5f,  .5f,  PointTopLeft,    0.f, 0.f,   PointBottomLeft, 0.f,  PointBottomLeft, 250, ResolutionY - 60  },
...
};

// Generate the game world landscape
for (int o = 0; o < worldObjectCount; o++)
{
	Platform p;

	// Create geometry
	ObjectDefinition &obj = objdef[o];

	if (obj.shape == Rectangle)
		p.geom = MakeRectangleGeometry(obj.width, obj.height);

	if (obj.shape == Ellipse)
		p.geom = MakeEllipseGeometry(obj.width, obj.height);

	p.geom.SetTransform(
		p.geom.Scale(obj.scaleX, obj.scaleY, obj.scalePoint)
		* p.geom.Skew(obj.skewAngleX, obj.skewAngleY, obj.skewPoint)
		* p.geom.Rotate(obj.rotAngle, obj.rotPoint)
		* p.geom.Move(obj.topLeftX, obj.topLeftY));

	p.geom.SetAutoAdjustBrushTransform(true);

	// Create bounding box
	p.bounds = p.geom.GetBounds();

	// Set defaults
	p.surface = Normal;
	p.moving = false;
	p.defaultX = obj.topLeftX;
	p.defaultY = obj.topLeftY;

	worldObjects.push_back(p);
}

// Special cases

// Two moving platforms
worldObjects[11].moving = true;
worldObjects[11].x = Animation(Animations::Cos, 2500, 60, -20, 0.0f, 1.0f, Animation::Repeat, false);
worldObjects[11].y = Animation::WaitAt(0, 1000);

worldObjects[12].moving = true;
worldObjects[12].x = Animation::WaitAt(0, 1000);
worldObjects[12].y = Animation(Animations::Linear, 1000, 50, -25, 0.0f, 1.0f, Animation::Reverse, false);

// Slippery ice platforms
worldObjects[15].surface = Frictionless;
worldObjects[16].surface = Frictionless;
worldObjects[17].surface = Frictionless;

// etc....
As you can see, first we create the properties for each piece of geometry in an array of ObjectDefinitions, then we use this data to create the geometry. It is this ObjectDefinition struct which provides our starting point. If we can modify it to also include all the extra information for each platform, such as its surface type and movement paremeters, we will have a complete definition which describes the shape, type and movement of a single piece of geometry, which we can serialize and store in a file.
Here is the complete struct which I have called GeometryDefinition:
// Surface types
const int SurfaceTypes = 5;

typedef enum {
	Normal = 0,
	Frictionless = 1,
	Sticky = 2,
	Ladder = 3,
	JumpThrough = 4
} SurfaceType;

// Geometry types
typedef enum { GT_Rectangle, GT_Freeform } GeometryType;

// Movement types
typedef enum {
	MT_Unknown = 0,
	MT_Linear = 1,
	MT_Cosine = 2,
	MT_Sine = 3
} MovementType;

// This structure allows us to quickly define the layout of each landscape object
typedef struct {

	// Settings for rectangle geometry
	int width;
	int height;

	// Geometry type
	GeometryType shape;

	// Geometry transforms
	float scaleX;
	float scaleY;
	GeometryTransformPoint scalePoint;
	float skewAngleX;
	float skewAngleY;
	GeometryTransformPoint skewPoint;
	float rotAngle;
	GeometryTransformPoint rotPoint;

	// Geometry location
	int topLeftX;
	int topLeftY;

	// Surface type
	SurfaceType surface;

	// Moving geometry
	bool moving;

	// Movement function
	MovementType moveFuncX, moveFuncY;

	// Movement parameters
	int moveIntervalX, moveIntervalY;
	double moveBaseX, moveBaseY;
	double moveAmplitudeX, moveAmplitudeY;
	double moveCropLowerX, moveCropLowerY;
	double moveCropUpperX, moveCropUpperY;
	Animation::CycleType moveCycleTypeX, moveCycleTypeY;
} GeometryDefinition;
The first thing to notice is we have created some enums to specify the various surface types, movement functions etc. enums can be cast to int so they can be serialized. GeometryTransformPoint is defined in Simple2D as:
// A transformation point
enum GeometryTransformPoint { PointCenter, PointTopLeft, PointTopRight, PointBottomLeft, PointBottomRight };
and specifies the point on the object around which the scaling, rotation or skew transform will occur.
Animation::CycleType is defined in Simple2D as:
class Animation {
...
	enum CycleType { Repeat, Clamp, Reverse };
...
At the end of the struct, we have added parameters to specify the platform’s surface type (and henceforth its behaviour and effect on the player’s physics model), and all of the parameters which may be needed to create an Animation object for each axis if the platform is moving.
GeometryDefinition and the related enums can be shared by the game and the level editor, and indeed you can find it in SharedPlatformCode.h in the source files linked at the top of the page.
Exporting a level to a file using Boost
At the moment we have no way of actually filling GeometryDefinition with data besides doing it by hand as we have currently with the previous version of the data structure. Ideally, you will create a level editor to do this, but in the meantime let us suppose that we have an array of GeometryDefinitions filled with information about all the platforms in our level. Is there a convenient way to write it to a file?
Well, there are in fact lots of ways, but my favourite is to use the Boost library, specifically the Boost.Serialization library, a well-developed and maintained set of classes for serializing and de-serializing various kinds of data.
Boost.Serialization is great because we don’t have to care about the actual file format, or how to parse it; we can just provide a definition about how to serialize a particular class or struct, and Boost will do the rest. In addition, Boost.Serialization provides versioning, which enables backwards-compatibility with older file formats as you add new things to your game’s capabilities and find the need to store additional data in the level files. Versioning enables you to load a level stored in a previous version of the file format you used into your game and it will still work correctly.
Before we look at versioning though, let’s look at how to incorporate Boost.Serialization into our code. I will assume you have installed Boost and have your header and library paths and linker inputs set correctly – the Boost documentation is your friend here.
First we’ll need some #includes:
#include <fstream>
#include <boost/archive/text_oarchive.hpp>
#include <boost/archive/text_iarchive.hpp>
#include <boost/serialization/string.hpp>
The first item is the C++ standard library’s file handling functions. This lets us open files for input and output, and read and write to them. The next two items allow us to use Boost.Serialization to serialize and de-serialize data respectively. The final item allows us to serialize and de-serialize std::strings, which we will find a use for shortly.
Boost needs to know how to serialize our GeometryDefinition so we must provide a template with this information. You must create a private member section in the struct and add code like this:
private:
	// Allow Boost::serialization access to private members
	friend class boost::serialization::access;

	// This template describes how to serialize and deserialize the geometry definition into/from a file
	template <typename Archive>
	void serialize(Archive &ar, const unsigned int version)
	{
		ar & surface;
		ar & topLeftX; ar & topLeftY; ar & width; ar & height; ar & shape;
		ar & scaleX; ar & scaleY; ar & scalePoint;
		ar & skewAngleX; ar & skewAngleY; ar & skewPoint;
		ar & rotAngle; ar & rotPoint;

		ar & moving;
		ar & moveFuncX; ar & moveIntervalX; ar & moveAmplitudeX; ar & moveBaseX; ar & moveCropLowerX; ar & moveCropUpperX; ar & moveCycleTypeX;
		ar & moveFuncY; ar & moveIntervalY; ar & moveAmplitudeY; ar & moveBaseY; ar & moveCropLowerY; ar & moveCropUpperY; ar & moveCycleTypeY;
	}
boost::serialization::access must be set as a friend class so that it can access private members of GeometryDefinition. We then provide the serialize template function which describes both how to serialize and de-serialize the struct. Put simply, we are supplied with a stream-like object called an archive. This archive supports the & operator, with the right-hand side set to the item we want to serialize or de-serialize. Therefore, we simply feed a list of all the members of the struct to the archive one at a time. Note the order the variables are serialized in does not matter, relative to the order they are defined in the class or struct, so long as they are de-serialized in the same order. If there is anything we don’t want to include in the serialization, we can just leave it out of the list, and if there is any extra information we may want to serialize, we can supply it directly.
To prevent compiler warnings from Boost about casting enums to ints, add the following macro call after the closing brace of the struct definition:
// Prevents warnings from Boost when serializing enums (eg. GeometryTransformPoint)
BOOST_CLASS_TRACKING(GeometryDefinition, boost::serialization::track_never)
Now we’ve got the geometry definitions covered, we want to actually write the code to save a level. The level file will contain a few other things besides geometry, namely:
- The player’s (X,Y) start co-ordinates in the level
- The number of objects defined (so that the level loading code knows how many objects to read in from the file)
- The filenames of the background and parallax background (or ‘mediumground’ as we called it in Part 3)
Naturally, the code to save the level will go in the level editor (since the game itself has no reason to save level files, only load them) and looks like this:
void MyProgram::Save(std::string filename)
{
	std::ofstream LevelFile(filename, std::ios::out);
	boost::archive::text_oarchive oa(LevelFile);

	// Player start position in level
	oa << playerStartX;
	oa << playerStartY;

	// Number of geometry items
	int s = worldObjects.size();
	oa << s;

	// Geometry definitions for each platform
	for (auto it = worldObjects.begin(); it != worldObjects.end(); it++)
		oa << (*it).def;

	// Name of background and mediumground
	oa << backgroundFilename;
	oa << mediumgroundFilename;

	LevelFile.close();
}
There is nothing too complex here. We open a file for writing and connect it to a Boost.Serialization output archive object, which we store the handle to in oa. We then simply write all the data we want to serialize into the file to oa as if it were a regular C++ stream, and close the file when we’re done. Here we save the player’s X and Y start co-ordinates, the number of geometry items, the GeometryDefinition for each geometry (worldObjects is an array of objects, each of which has a member def which is a GeometryDefinition), and the names of the background image files – which are stored as std::strings, hence our inclusion of the string serialization header earlier.
Loading the level into the level editor
The level editor does not care about collision detection, physics, the behaviour of each platform (piece of geometry), its movement and so on, so we use a very stripped down definition of Platform as follows:
// An individual platform or surface
struct Platform {

	// The geometry (shape) of the surface
	Geometry geom;

	// The geometry description of the surface
	// This is the stuff that's saved and encapsulates everything in Platform in numerical format
	GeometryDefinition def;
};
(found in LevelEditor.h)
It literally contains just the geometry definitions and the resulting Direct2D geometry which is created from it. Note that we keep the geometry definitions after loading since when we modify geometry in the level editor, we won’t be modifying the Direct2D geometry directly; instead, we will modify the definition and re-create the geometry. In this way, the level editor can show an accurate up-to date view of the game world while still retaining all of the GeometryDefinitions needed to save it to a file so it can be re-created exactly. If we just modified the Direct2D geometries directly, we wouldn’t be able to do this.
The level loading code looks like this (found in LevelEditor.cpp):
void MyProgram::Load(std::string filename)
{
	std::ifstream LevelFile(filename);
	boost::archive::text_iarchive ia(LevelFile);

	// Player start position in level
	ia >> playerStartX;
	ia >> playerStartY;

	int numObjects;
	ia >> numObjects;

	// Geometry definitions for each platform
	worldObjects.clear();
	for (int i = 0; i < numObjects; i++)
 	{
 		Platform p;
 		ia >> p.def;
		p.geom = sharedTools.CreateGeometry(p.def);
		worldObjects.push_back(p);
	}

	// Name of background and mediumground
	ia >> backgroundFilename;
	ia >> mediumgroundFilename;

	LevelFile.close();
}
As you can see this is quite similar to the level-saving code, with the exception that we initially empty the game world (worldObjects), read in the GeometryDefinitions one by one into a new Platform object, create the Direct2D geometry for the platform from its definition, then add the platform to the list of game world objects.
The function sharedTools.CreateGeometry is a piece of code shared between the game and the level editor which generates a piece of Direct2D geometry from a GeometryDefinition. It is very similar to the code we used to use in SetupResources() to make each geometry and looks like this (found in SharedPlatformCode.cpp):
// Create geometry from a geometry definition
// The shape type, pos/width/height and all transform parameters and surface type must be filled in
// Remaining members of GeometryDefinition are ignored
Geometry SharedTools::CreateGeometry(GeometryDefinition &obj)
{
	Geometry g;

	// Create geometry
	if (obj.shape == GT_Rectangle)
		g = renderer->MakeRectangleGeometry(obj.width, obj.height);

	// Transform geometry
	g.SetTransform(
		g.Scale(obj.scaleX, obj.scaleY, obj.scalePoint)
		* g.Skew(obj.skewAngleX, obj.skewAngleY, obj.skewPoint)
		* g.Rotate(obj.rotAngle, obj.rotPoint)
		* g.Move(obj.topLeftX, obj.topLeftY));

	// Make sure tiles render aligned to geometry shape
	g.SetAutoAdjustBrushTransform(true);

	return g;
}
Loading the level into the game
Unlike the level editor, the game does care about movement, physics and collision detection, so we use the same Platform struct we were using before:
// An individual platform or surface
struct Platform {

	// The surface type
	SurfaceType surface;

	// The geometry (shape) of the surface
	Geometry geom;

	// The bounding box of the surface
	D2D1_RECT_F bounds;

	// Specifies whether the platform is moving and needs a per-frame update
	bool moving;

	// The initial X and Y position of a moving platform
	int defaultX;
	int defaultY;

	// The bounding box of the platform on the previous frame
	// (used to calculate movement distance to adjust the player's position when standing on the platform)
	D2D1_RECT_F previousBounds;

	// The X and Y movement functions
	Animation x;
	Animation y;

	// Update the position of a platform if it is moving
	void Update();
};
Notice that unlike the definition of Platform in the level editor code, we do not save the GeometryDefinition objects here. Why? Because the game doesn’t need them once the game world geometry has been created. It will simply read each one from the level file, create the platform and throw the GeometryDefinition away.
Loading the level into the game is substantially more complex as much more work has to be done to populate each Platform correctly, and after that we must load the correct background image files and calculate some things – such as the world extents to determine where the game world and backgrounds should scroll – which were previously hard-coded.
Things start off in a familiar way:
// Load a level
void MyProgram::LoadLevel(std::string filename)
{
	std::ifstream LevelFile(filename);
	boost::archive::text_iarchive ia(LevelFile);

	// Player start position in level
	ia >> playerStartX;
	ia >> playerStartY;

	// Number of geometry objects
	int numObjects;
	ia >> numObjects;

	// Geometry definitions for each platform
	worldObjects.clear();
	GeometryDefinition d;
As with the level editor, we load in the player’s start position and the number of objects in the game world, then clear the existing game world so it is empty, and create a temporary object to receive each GeometryDefinition one at a time.
The loop to process each piece of geometry looks like this:
for (int i = 0; i < numObjects; i++)
{
 	ia >> d;

	Platform p;
	p.geom = sharedTools.CreateGeometry(d);
	p.bounds = p.geom.GetBounds();

	p.surface = d.surface;
	p.moving = d.moving;
	p.defaultX = d.topLeftX;
	p.defaultY = d.topLeftY;

	if (p.moving)
	{
		boost::function<double (double)> mfX, mfY;

		if (d.moveFuncX == MT_Linear) mfX = Animations::Linear;
		if (d.moveFuncX == MT_Cosine) mfX = Animations::Cos;
		if (d.moveFuncX == MT_Sine)   mfX = Animations::Sin;

		if (d.moveFuncY == MT_Linear) mfY = Animations::Linear;
		if (d.moveFuncY == MT_Cosine) mfY = Animations::Cos;
		if (d.moveFuncY == MT_Sine)   mfY = Animations::Sin;

		p.x = Animation(mfX, d.moveIntervalX, d.moveAmplitudeX, d.moveBaseX, d.moveCropLowerX, d.moveCropUpperX, d.moveCycleTypeX, false);
		p.y = Animation(mfY, d.moveIntervalY, d.moveAmplitudeY, d.moveBaseY, d.moveCropLowerY, d.moveCropUpperY, d.moveCycleTypeY, false);
	}

	worldObjects.push_back(p);
}
For each GeometryDefinition, we create a Platform, populate its geom field with a Direct2D geometry made from the GeometryDefinition using the same CreateGeometry() function used above in the level editor. So far this is the same as how the level editor sets up platforms, but in the game, we must also set the surface type, moving flag and top-left co-ordinates of the object, and retrieve the geometry’s initial bounding box. Once this is done, we convert the movement type enums into function pointers and create an Animation object for each axis using the movement data supplied in the GeometryDefinition. Finally, the fully-populated Platform is added to the game world.
While the level editor merely fetches the background image filenames, the game also has to load the images:
WCHAR bgfn[1000], mgfn[1000];

ia >> bgfn;
ia >> mgfn;

background = MakeImage(bgfn);
mediumground = MakeImage(mgfn);

LevelFile.close();
Next, we have to calculate the X and Y extents (size) of the game world so that we know when to stop scrolling the game world display so that we don’t go beyond its edges. The easiest way to do this is calculate the total bounding box of all the geometry in the game world; the bounding box’s width and height represent the level extents:
// Calculate total bounding box of world
D2D1_RECT_L worldBounds = { 0, 0, 0, 0 };

for (auto it = worldObjects.begin(); it != worldObjects.end(); it++)
{
	worldBounds.left = min(static_cast<LONG>(it->bounds.left), worldBounds.left);
	worldBounds.right = max(static_cast<LONG>(it->bounds.right), worldBounds.right);
	worldBounds.top = min(static_cast<LONG>(it->bounds.top), worldBounds.top);
	worldBounds.bottom = max(static_cast<LONG>(it->bounds.bottom), worldBounds.bottom);
}

// Set level extents
levelExtentX = static_cast<float>(worldBounds.right - worldBounds.left);
levelExtentY = static_cast<float>(worldBounds.bottom - worldBounds.top);
The final problem is that the game code expects the world origin (bottom-left corner) to be at (0, 480), but our level editor allows the user to draw objects anywhere. To fix this, we take the difference between the bottom-left corner of the game world’s bounding box and the desired origin of (0, 480), producing an offset which we can add to every piece of geometry (and the player’s start position) to re-locate the entire game world such that the bottom-left corner of its bounding box is at the desired origin.
// Move game world so that the bottom left is at the world origin (0, ResolutionY)
LONG originX = 0, originY = ResolutionY;

LONG offsetX = -worldBounds.left + originX;
LONG offsetY = -worldBounds.bottom + originY;

playerStartX += offsetX;
playerStartY += offsetY;

for (auto it = worldObjects.begin(); it != worldObjects.end(); it++)
{
	it->geom.SetTransform(it->geom.GetTransform() * it->geom.Move(offsetX, offsetY));
	it->bounds = it->geom.GetBounds();
	it->defaultX += offsetX;
	it->defaultY += offsetY;
}
That concludes the work of loading a level. To make it work, we need to tweak a few things in the rest of the game code. Add definitions for the level loader function, level extents and player start position to the main game class definition:
// Load a level
void LoadLevel(std::string filename);
...
// World extents from origin
float levelExtentX, levelExtentY;

// The player's start position in the level
float playerStartX, playerStartY;
...
Remove the default background loading code and the call to spawnPlayer() from the class constructor (the player should not be spawned until the level has been loaded):
/* REMOVE THESE LINES */
background = MakeImage(L"bg.png");
mediumground = MakeImage(L"mg.png");
...
/* REMOVE THESE LINES */
// Set player defaults
spawnPlayer();
Delete the entire contents of SetupResources() which currently creates a hard-coded level, and replace it with:
bool MyProgram::SetupResources()
{
	// Load the default level
	LoadLevel("default.splevel");

	// Set player defaults
	spawnPlayer();
}
Remove the hard-coded setting of the level extents in DrawScene():
/* REMOVE THESE LINES */
float levelExtentX = static_cast<float>(ResolutionX*3);
...
float levelExtentY = static_cast<float>(ResolutionY) * 1.6f;
Finally, change the hard-coded initialization of the player’s start position in spawnPlayer() to use the values loaded from the level file instead:
// Set starting position
/* REPLACE THESE LINES */
playerX = 120.f;
playerY = 400.f;

/* WITH THESE LINES */
playerX = playerStartX;
playerY = playerStartY;
Your game code should now be able to load a level from a file, populate the game world with Platforms based on the loaded GeometryDefinitions, load the level’s background images, and set the player’s position and the scroll zone correctly.
Versioning for level files
While we are happy with our level file format as it is now, what happens later when we want to add coins, baddies, checkpoints, new types of geometry, or change the way the existing data is stored? We will need to change the file format to incorporate any new features and modifications, meaning that any levels we have saved previously will no longer load correctly, or will need to be converted.
Luckily, Boost.Serialization provides a simple but effective solution to this problem, called versioning. It can be applied to individual types or the whole file, and essentially stores a version number before the serialized type, which is then passed to the private serialize() template function you supply in the type’s definition describing the serialization process for that type. Recall from the definition of GeometryDefinition above:
// This template describes how to serialize and deserialize the geometry definition into/from a file template
template <typename Archive>
void serialize(Archive &ar, const unsigned int version)
{
	ar & surface;
	ar & topLeftX; ar & topLeftY; ar & width; ar & height; ar & shape;
	ar & scaleX; ar & scaleY; ar & scalePoint;
	ar & skewAngleX; ar & skewAngleY; ar & skewPoint;
	ar & rotAngle; ar & rotPoint;

	ar & moving;
	ar & moveFuncX; ar & moveIntervalX; ar & moveAmplitudeX; ar & moveBaseX; ar & moveCropLowerX; ar & moveCropUpperX; ar & moveCycleTypeX;
	ar & moveFuncY; ar & moveIntervalY; ar & moveAmplitudeY; ar & moveBaseY; ar & moveCropLowerY; ar & moveCropUpperY; ar & moveCycleTypeY;
}
The second parameter version is the version number of the type format. Since we haven’t configured a version number, this will always be zero at the moment, but let us suppose we have changed the way the type is serialized. Underneath the class definition, we can add a macro like this:
BOOST_CLASS_VERSION(GeometryDefinition, 1)
By way of example, while I was testing the code, I included two arrays of 100 integers after the serialization of rotPoint but before moving. When I removed this from the format, I incremented the version number in the macro (to 1) and the code now looks like this:
template <typename Archive>
void serialize(Archive &ar, const unsigned int version)
{
	ar & surface;
	ar & topLeftX; ar & topLeftY; ar & width; ar & height; ar & shape;
	ar & scaleX; ar & scaleY; ar & scalePoint;
	ar & skewAngleX; ar & skewAngleY; ar & skewPoint;
	ar & rotAngle; ar & rotPoint;

	if (version == 0)
	{
		int junk;
		for (int i = 0; i < 100; i++)
		{
			ar & junk;
			ar & junk;
		}
	}

	ar & moving;
	ar & moveFuncX; ar & moveIntervalX; ar & moveAmplitudeX; ar & moveBaseX; ar & moveCropLowerX; ar & moveCropUpperX; ar & moveCycleTypeX;
	ar & moveFuncY; ar & moveIntervalY; ar & moveAmplitudeY; ar & moveBaseY; ar & moveCropLowerY; ar & moveCropUpperY; ar & moveCycleTypeY;
}
This looks at the version of the type being loaded. If it is the original version – version 0 – then the two arrays of integers are present, so we just read them in to temporary variables and discard all the values, effectively skipping over it. In version 1, the arrays were removed, so the if statement does nothing.
This works equally well for adding things too: if the version number of the file is not the latest, simply initialize the items that are missing from the file with default values or values that specify the item isn’t used in the level.
Creating a Level Editor
The purpose of a level editor is two-fold:
- to accelerate the production of levels
- to enable non-programmers – ie. designers on your team or members of the general public – to create levels
Many of you may be used to modular programming; the idea of making things re-usable as much as possible. Writing both games and tools for games (such as level editors) somewhat demands the opposite approach. Most game code will be very specific to one particular game, as will most editor code, so don’t worry too much about modularizing everything.
Consider your target audience (and possible future target audience) when you create the interface for the level editor. If you are only going to use it yourself, then it doesn’t matter if it’s a bit sloppy, but if your users may be technical novices, the editor needs to provide a standard interface that will be immediately familiar to new users.
As much as possible, try to separate your user interface code from the code which actually performs modifications to the level, or you will end up with a big mess of spaghetti code. Many level editing functions may also be accessible in more than one way, for example a toolbar button click or key press may both activate the same editing action, so such actions should go in their own functions.
The simplest feature-complete level should be able to:
- load, save and display levels
- pan around the level view
- create standard game world objects
- move and delete objects
- edit the properties of objects (for example, movement speed)
- provide instructions, if for use by other people
Anything else is a bonus. Depending on the complexity of your game and levels, you may want to include productivity tools like the ability to select several objects at once and move or edit them in one operation.
The level editor does not need to know how the physics model of the game works or worry about how objects in the level will interact with each other or the player. It must simply render the game world (using similar code to that in the game itself) and allow objects to be added, moved around and deleted, and their properties edited.
To see how to do all of the above with our GeomeryDefinition object as the basis, take a look at the source code linked at the top of the page.
Sharing Common Code between the Game and Level Editor
If you use Visual Studio, you can share source code files between projects in the same solution, which is handy because your game and level editor will likely be stored in the same solution. Simply right-click on the project you want to add code to from another project, choose Add Existing Item from the menu and browse to the source file you wish to include. Although the file will then appear twice in Solution Explorer, only one copy exists, so editing it in one project will also update it in the other project.
Generally should have a header file containing any enums and data-oriented classes or structs shared between the game and the editor, and a source file with matching name containing any shared functions or methods.
In our SharedPlatformCode.h header, we have already defined GeometryDefinition and some related enums. For the shared functions, I have made a singleton class which defines all the shared functions and retains a pointer to the main game/editor application class:
// Shared code
class SharedTools
{
	Simple2D *renderer;

public:
	SharedTools() : renderer(nullptr) {}
	SharedTools(Simple2D *r) : renderer(r) {}

	// Create Direct2D geometry from GeometryDefinition description
	Geometry CreateGeometry(GeometryDefinition &obj);
};
The source file SharedPlatformCode.cpp contains the implementation of all the shared functions (in this case, just CreateGeometry() for which we saw the code earlier). These two files are stored in the level editor project but included in the game project so they can be shared.
Making an instance of the class available is a simple case of declaring it as a member of the game/editor class:
// Shared platform code
SharedTools sharedTools;
And initializing it in the game/editor class constructor:
// Setup shared resources
sharedTools = SharedTools(this);
Tips for Level Editor Coding
Here are some assorted tips for level editor coding. Again, I recommend you examine the source code linked at the top of the article thoroughly for the full details.
Direct2D Render Target Clipping
I’m addressing primarily programmers using the Win32 API directly here. The first problem you’ll discover when trying to render Windows controls on top of a Direct2D render target plotted in your window’s client area (to show the game world view) is that you can’t, by default. All the controls will appear underneath the output from Direct2D.
Fix this by ensuring you create your main application window with the WS_CLIPCHILDREN flag. This ensures that any items rendered in front (the Direct2D) will be clipped just enough so that items behind (your toolbar controls etc.) will show through and be visible. Any child windows you make should likely also be created with the WS_CLIPCHILDREN and WS_CLIPSIBLINGS styles.
Creating child windows and controls when using the Simple2D framework
Version 1.06 of Simple2D and later provides the GetWindow() method which returns the window handle to the main application window as an HWND. You can use this to set the application window as the parent to your controls when you call CreateWindowEx().
Simple2D defines the constant HINST_THISCOMPONENT as an HINSTANCE to the current process, which you will also need when calling various Win32 functions that take a HINSTANCE parameter, for example when locating embedded resources.
Some basic helper functions
The files WindowsHelper.h and WindowsHelper.cpp provide a few basic helper functions to get you going creating a level editor using the Windows GUI. You should ideally not program with Win32 directly and use a higher-level abstraction such as MFC; unfortunately Simple2D handles the application window and message pump for you automatically which makes this somewhat awkward. The included source code also ensures that visual styles are enabled (so the controls don’t look like Windows 95-style defaults) and sets the font for each control to the default GUI font.
Define constraints for object creation and editing
Not all game object types are alike. In our level editor, we define a list of constraints for how each platform type can be created, sized and edited which are implemented in the editing code. The definition looks like this:
// Creation and editing constraints for each platform type
struct SurfaceConstraints {

	// Surface name
	TCHAR name[100];

	// Minimum dimensions and expansion step size
	int stepX, stepY;

	// Maximum dimensions
	int maxX, maxY;

	// Default scale factor
	float scaleX, scaleY;

	// Allow rotation
	bool allowRotate;

	// Allow scale
	bool allowScale;

	// Allow skew
	bool allowSkew;

	// Allow the surface type to be changed to a different type
	bool allowChangeFrom;

	// Allow the surface type of another geometry to be changed to this type
	bool allowChangeTo;
};
Consider the ladder object:
constraints[Ladder].allowRotate = false;
constraints[Ladder].allowScale = false;
constraints[Ladder].allowSkew = false;
constraints[Ladder].maxX = 20;
constraints[Ladder].maxY = 100000;
constraints[Ladder].stepX = 20;
constraints[Ladder].stepY = 20;
constraints[Ladder].scaleX = 1.f;
constraints[Ladder].scaleY = 1.f;
constraints[Ladder].allowChangeFrom = constraints[Ladder].allowChangeTo = false;
Ladders must always be vertical and the same width so they cannot be rotated, scaled or skewed. They have a fixed max width of 20 pixels, and can be any height. When the user drags to create the ladder, its vertical size increases in units of 20 pixels (ie. one rung) at a time. You do not want a ladder with half a rung. Ladders cannot be changed to other platform types, and other platform types cannot be changed to ladders.
These kinds of constraints ensure that the objects are always created and edited in a way that makes sense, and goes some way to idiot-proof the process. Use constraints in your own level editor where appropriate.
Bringing objects to the front and back
We may want objects to appear in front of or behind other objects, but 2D engines typically render items in the order they appear in the list of game world objects. We can easily allow objects to be brought to the foreground or background by shuffling their positions around in the list. In our level editor, the shortcut keys F and B do this when an object is selected:
// Bring selected geometry to front of render queue
if (key == 'F' && selectedGeom)
{
	Platform p = *selectedGeom;
	worldObjects.erase(selectedGeomIt);
	worldObjects.push_back(p);
	SelectGeometry(worldObjects.end() - 1);
	return true;
}

// Push selected geometry to back of render queue
if (key == 'B' && selectedGeom)
{
	Platform p = *selectedGeom;
	worldObjects.erase(selectedGeomIt);
	worldObjects.push_front(p);
	SelectGeometry(worldObjects.begin());
	return true;
}
The code only executes if an item is currently selected (the currently selected geometry is stored in selectedGeom). When bringing an object to the front, we want it to be rendered last, and when pushing it to the back, we want it to be rendered first, so we remove it from wherever it currently is in the last and re-insert it at the beginning or end as applicable. Note the important gotcha that we have to re-select the geometry in code once we’ve moved it so that the same piece of geometry is still selected as before (moving it in the list invalidates its pointer).
Snapping objects to a grid
Snap-to-grid is a very useful feature in many applications for allowing us to quickly align things neatly, and level editors are no exception. To make sure that snap-to-grid works everywhere in your application, you must replace all references to mouse and geometry x and y co-ordinates with the ‘snapped’ versions. We define a function:
// Snap supplied mouse or world co-ordinates to grid if active
D2D1_POINT_2L MyProgram::snapToGrid(int x, int y)
{
	D2D1_POINT_2L p = D2D1::Point2L(x, y);

	if (useGrid)
	{
		p.x = (x / gridSizeX) * gridSizeX;
		p.y = (y / gridSizeY) * gridSizeY;
	}

	return p;
}
If the grid is currently turned off, this function does nothing, otherwise it snaps the co-ordinates to the top-left pixel of the current grid square.
We then replace all the references to the mouse and world x and y co-ordinates elsewhere in the code with calls to snapToGrid(), for example when the user starts dragging to create a new platform:
// Start creating rectangular geometry
if (message == WM_LBUTTONDOWN && editMode == EM_NewGeom)
{
	// Create initial bounding box using mouse cursor as top-left point
	D2D1_POINT_2L g = snapToGrid(x, y);
	createBox.left = g.x;
	createBox.top = g.y;
...
You Are Now Leaving The Fluffy Dimension
That wraps up our overview of external level storage and editing. I know this article was somewhat more ‘fluffy’ and less concrete than usual; writing an entire editor is a big topic and outside the scope of a single article unfortunately, but I hope these tips and source code helps you get on the right track!
In Part 10, we’ll look at some improvements to the level storage code developed here. Until next time!
-
January 4, 2014 at 00:372D Platform Games Part 12: A Framework for Interactive Game Objects | Katy's Code
-
March 15, 2013 at 15:16Tetris: Adding polish with music, sound effects, backgrounds, game options, an intro sequence and other tweaks | Katy's Code
-
February 6, 2013 at 18:292D Platform Games Part 10: Improved Level Management and Storage « Katy's Code
-
January 30, 2013 at 11:432D Platform Games Part 8: Pass-through Platforms « Katy's Code
Katy would love it if you could help keep her stocked with cookies while she codes!


You must be logged in to post a comment.